When Electronics Meets Chemistry: A Conductivity Sensor For Liquid Solutions

Every now and then, my wife asks me to build a gadget that she can use in school for her demos, or for the students labs. This time she asked me for a device able to figure out if a liquid solution has low or high resistivity. Basically, if it is an ionic or covalent solution.
Here is what I put together for her in just a week-end.

Every now and then, my wife asks me to build a gadget that she can use in school for her demos, or for the students labs. This time she asked me for a device able to figure out if a liquid solution has low or high resistivity. Basically, if it is an ionic or covalent solution.

Here is what I put together for her in just a week-end.

It is a simple circuit that turns on an LED if a simple probe is put in contact with an ionic solution with relatively low resistance.

Since it needs to be portable, it is powered with a simple 9V battery.

The circuit uses an op-amp configured as a voltage follower. The output is connected to a green LED which lights up if the output goes low.

The non-inverting input is connected to the +9V through a resistor, which I calibrated empirically. Because the non-inverting input is connected to the +9V, the output will also be high and the LED will be off.

However, I can also connect the non-inverting input and the ground of the circuit to the solution through a couple of wires. If the resistance of the solution is low enough, the voltage at the non-inverting input will lean toward ground, making the op-amp output to switch to low which, in turn, will turn on the LED.

Simple enough, don’t you think?

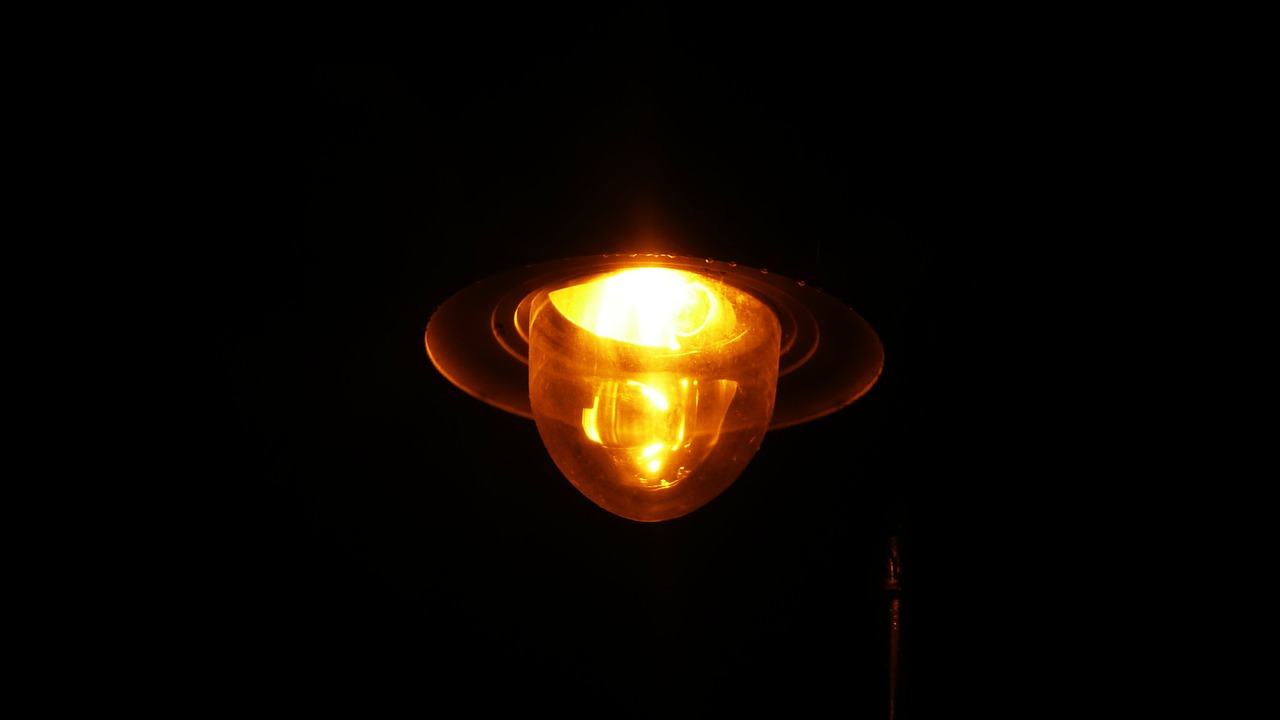
My wife’s students will use this device to check the conductivity of a solution, to determine if the material they put in some distilled water is an ionic or covalent compound. The LED will turn on only with ionic compounds, that will decrease the resistivity of the distilled water.

For this simple device, I designed in OpenSCAD a small box to contain it. Here is the corresponding code:

$fa=0.5;
$fs=0.5;

//body
difference()
{
    cube([52, 23, 70]);
    translate([1, 1, 1]) cube([50, 21, 70]);
    translate([23, 1, -1]) cube([6, 3, 3]);
}

// cap
translate([0, 35, 0]) difference()
{
    cube([55, 26, 30]);
    translate([1, 1, 1]) cube([53.5, 24, 30]);
    translate([(55-14.5)/2, (26.5-9.5)/2, -1]) cube([14.5, 9.5, 4]);
    translate([(55-14.5)/4, 26/2, -1]) cylinder(d=5, h=4);
}

and here is a picture from the OpenSCAD preview window:

Here, instead, is a picture of the actual case:

Now a picture of the prototype mounted on a breadboard:

Testing of the device requires a small cup of plain water. We submerge the tip of the sensor (the two breaded wires) in to the cup and make sure that the LED stay off. Then we add a pinch of table salt to the water and try again. This time the LED must turn on, to signify that there is an ionic compound mixed in the water.

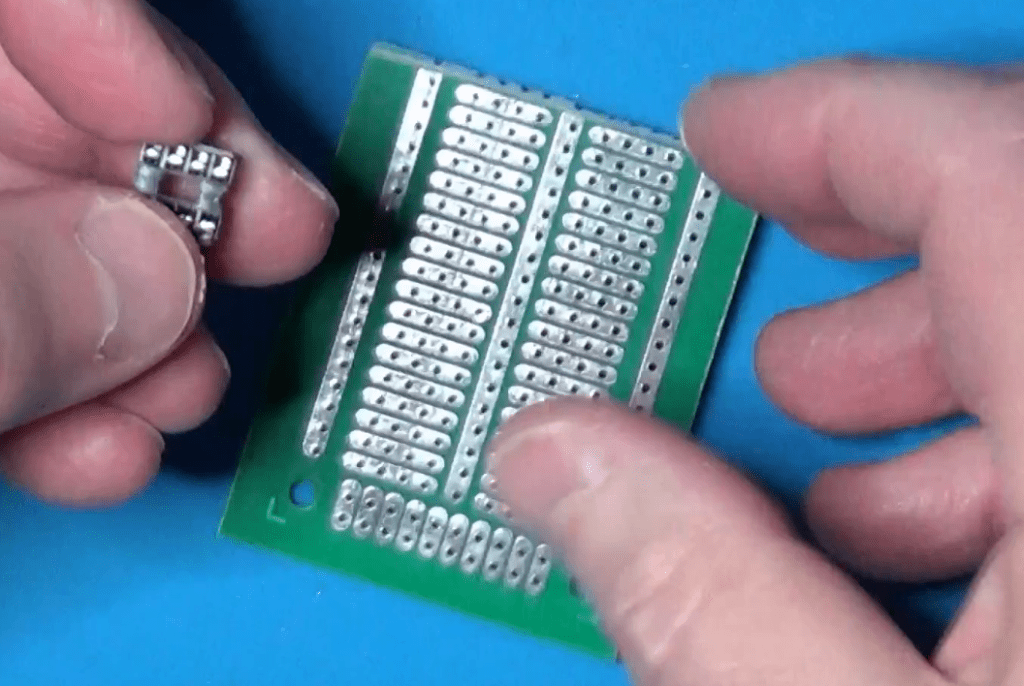
I mounted the circuit on a half piece of solderable breadboard.

I have chosen to cut the board in half for two reasons:

  1. The circuit is very small and does not require that much space to assemble it. Moreover, being small it will be easier to handle it with a single hand when using it in a chemistry lab.
  2. Using a solderable breadboard rather than a perfboard simplifies the wiring, because it is reduced just to some jumpers to complete the connections already available on the board.

These boards are very easy to find in online stores. I usually by mines on Amazon, but also other stores that sell electronic components have them available. Of course, you are free to use any kind of board you like, be it a simple perfboard, or a solderable breadboard, or a strip-board, or even make your own PCB.

I decided not to use the PCB because of the simplicity of the circuit. With so few components, making a PCB and put the components on it would have not saved me time, nor there was much risk of making mistakes.

Once the circuit on the board was completed, I put it inside the case I made for it, and completed the assembly with the LED and the power switch mounted on the cover. I also decided to use some tape to hold the cover on the case, considering that these little devices will be managed by students, and I don’t want them to easily open it and break it.

As an alternative, I could have used a couple of small screws to hold everything together, but this was something I had to do over a single week-end, so I decided to go through the fastest possible route for the design of the case.

My wife used the device in school right on the next day after I made it. She told me the sensor worked perfectly and her chemistry students enjoyed using it, while experimenting with different compounds to verify their nature.

All in all I am satisfied. I was able to design and build five of these devices in just a week-end, and they were all up to the expectations, of my wife of course.

If you are interested in making this device and would like to see more details on its construction, please click on the following link which will take you to my youtube video with the whole story:

Conductors, Insulators, and Semiconductors

cpu-3061923_1280

Everybody knows that an electric wire, usually made of copper, is a conductor. And everybody knows that all metals are conductors.

copper-72062_1280

Everybody also knows that plastic is a good electrical insulator, as well as other materials such as glass and rubber.

insulators-3838730_1280

But how about semiconductors? What are they? And how do we really distinguish among conductors, semiconductors and insulators?

To answer all these question we need to look deeper inside the materials.We know that matter is made of atoms, and atoms are made of protons, neutrons and electrons. Protons and neutrons reside at the center of the atom structure, called the nucleus. Electrons are allocated all around the nucleus, at a long distance from it, relatively to the scale of the nucleus itself.

Electrons have a certain amount of energy, that is always an integral value of a certain amount that is called quantum of energy. Depending on the amount of energy they posses, they are locate closer or farther away from the nucleus. The more energy, the farther they are.

Based on quantum mechanics, which we are not going to talk in details in this context, electrons occupy bands of energy. The farther bands in the atom are the so called Valence Band and Conduction Band.

The valence band contains all those electrons that allow the atoms to stick together and forming molecules by bonding with other atoms of the same or a different substance.

water-40708_1280

For certain materials, rather than having molecules, the atoms form what is called a crystalline lattice, which is the case we are more interested in this context. It is worth noting that a new theory, highly based on quantum mechanics, is also distinguishing between actual crystalline lattices and material networks. However, for all the scope and purpose of this context, we will make a simplification and name both of them as crystalline lattices.

lattice
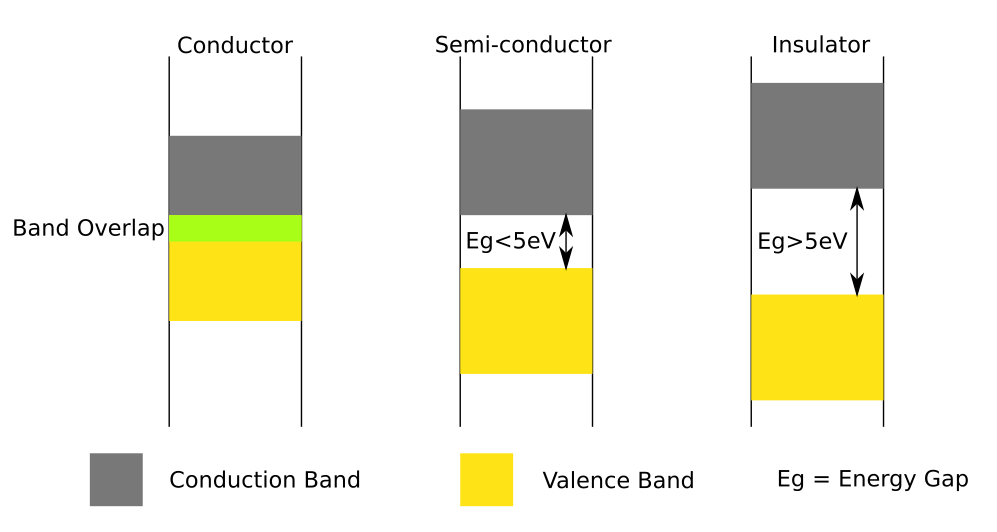
(This picture, courtesy of Wikipedia)

In certain conditions, electrons in the valence band can jump to a higher level of energy, thus moving in what is called the conduction band. In the conduction band, electrons are no more stuck to their own atoms, but can start moving freely in the lattice that makes up the material. When that happens, we can control their movement by applying an electric field by the means, for example, of a battery. The voltage of the battery, applied to the two ends of the same block of material (for example a wire), produces the electric field inside the material and forces the electrons to move toward the positive electrode of the battery while, in the mean time, the negative electrode of the battery provides electrons to the material, to replace those that have entered the positive electrode of the battery.

Don’t think that electrons move very fast when they do that. Electrons, in fact, move very slowly, but it is the huge amount of them that help creating a measurable current.

Then you would ask: but when I turn the switch on, the light comes out of a lamp instantly. If the electrons move slowly, shouldn’t a lamp emit light only after a while?

lamp-18869_1280

Well, yes and no. In fact, the lamp does not light up immediately. It takes a certain amount of time to do that. But that time is so small that for us the event happens instantly.

Also, when you turn the switch on, the electrons closest to the positive electrode move into it almost immediately, not because they are fast, but because they are so close to it. At the same time, new electrons are fed to the material from the negative electrode. So, at the end, all the electrons in the wire start moving simultaneously inside of it, causing the current to start flowing immediately.

But I am digressing. Let’s go back to our primary subject.

We have talked about electrons in the valence band and the possibility they have to jump to the conduction band and, thus, helping creating a current if we apply a voltage.

But how much energy do the electrons need to jump to the conduction band?

Here it comes the definition of conductors, semiconductors and insulators.

conductors_semiconductors_insulators

In the materials called conductors, the level of energy that the valence electrons need to jump to the conduction band is basically ‘0’. In fact, valence band and conduction band overlap each other and, therefore, some or all the electrons in the valence band are also, already, in the conduction band. This happens mostly with metals, like copper, iron, aluminum, and so forth. Depending on the particular metal, the conduction and valence bands are more or less overlapped. Those material where there is more overlap are those that conduct electricity better. Those material where there is less overlap, are those that are worst to conduct current, although still conductors.

In the materials called insulators, the gap between the valence band and the conduction band is so high that electrons cannot jump from the valence band to the conduction band, and so they cannot generate an electrical current.
Of course, if we apply a voltage high enough, we can still provide them the energy to make the jump. However, in that case, because of the very high voltage, electrons jump from one band to the other in a disruptive way, causing the material to break. Once that happened, the insulator loose its property and it is no good anymore as such.

Finally, in the materials called semiconductors, the valence band and the conduction band are separated, but close together. It is relatively easy for an electron in the valence band to jump to the conduction band if we only heat a little bit the semiconductor, maybe just with our bare hands. The heat provides enough energy to the electrons to jump to the conduction band. However, not many electrons will do so, unless we keep heating the semiconductor. So, at the end, although capable of conducting some current, semiconductors are not good in doing so. Thus the name of their category.

In this article, we have talked about energy bands in materials, and how materials behave based on the position of the two highest energy band levels.

We have said that conductors are those were valence and conduction bands are partially overlapping.

Conversely, insulators are those that have a high gap in between the valence and the conduction bands.

And finally, semiconductors are those somewhat in between. For them, the valence and conduction bands are separated with a gap, but that gap is small enough to allow, under certain conditions, for the electrons to jump from the valence to the conduction band. That’s why they perform poorly both as conductors and insulators. However, we will see later on how semiconductors can be of great advantage for us, as long as they are treated in a certain way. They are those that allow us to build all the wonders of modern electronics.

Electric Power Basics

electricity-3442835_1280

Power.

That is the word commonly used in every day language to refer to electricity. But what is really the electrical power?

To describe the meaning of electrical power, we need to dig into our knowledge of mechanical physics. In physics, power is the ratio at which energy is consumed or, in other words, is the number representing the energy used divided by the time needed to actually consume it.

Another way to say it is in terms of work. The energy consumed is, in fact, the work done on the system, so we can say that the power is the work done on the system in a certain amount of time.

In mechanical physics, the power is measured in Joules/Second, and the unit for it is called Watt, in honor of James Watt, a Scottish inventor, engineer and chemist of the 18th century that did a lot of work on the subjects of energy and power in mechanical systems.

power

Now that we have refreshed our knowledge on the concept of power, let’s see if we can find an equivalent way of defining it in the realm of electricity.

In terms of electricity, we need to consider the energy used to move the electrical charges, which is still a work, and it is done by the generator that powers the electrical circuit.

We know already how to measure the electric potential energy in electrical circuits: that is done by the voltage, which provides the energy per unit of charge:

voltage

From the voltage we can derive the energy itself:

energy

Now we have our energy consumed in the system to move the charges around. The electrical power is that energy divided by the time spent to use that energy:

el_power

Very interesting result, isn’t it? To calculate the electrical power we just need to multiply the voltage used to power the circuit by the current that flows into it. And, again, this power is measured in Watts, so the product of Volt and Ampere gives us the amount of watts used by the circuit.

Now that we have the formula for the power, it is easy to figure out how much power a generator provides when connected to a circuit. We just multiply the voltage of the generator by the current that is flowing through it.

And the power consumed by a load is the product of the voltage applied to the load and the current that flows through it.

Is the power provided by a generator the same as the one consumed by a load?

Well, in both cases we can measure it in Watts. However, in the first case the power goes out of the generator, while in the second case the power goes in to the load. We just need to establish a rule to make sure we can distinguish the direction in which the power flows.

We say that the power is negative when it goes out of a device and it is positive when it goes in.

So, in an electrical circuit with a generator and a load, the power is negative at the generator and is positive at the load. But the absolute amount in both cases is the same, and the sum of the two powers is therefore zero.

In fact, we have just verified the physics law of conservation of energy: in a closed system (the electric circuit), the total amount of energy never changes. The amount of energy produced by the generator equals the amount of energy absorbed by the load and, therefore, in any time interval (thus the power), the total is zero and never changes.

To conclude, we have talked about the electrical power. We have compared the way the power is calculated in mechanical systems with the way the power is calculated in electrical systems.

We have stated the rule to provide a sign to the power, and we have verified that this rule satisfies the law of the conservation of energy.

These concepts are general enough to apply to both DC and AC circuits. However, I will come back on these concepts in a future article to see how calculations are affected by loads having different electrical properties.

In the mean time, you can get some more information by watching the companion video on the Electrical Power that I recently published on my YouTube channel.

And, as always…

Happy Experiments!